Creating a tooltips campaign
Prequisites:
- You need to have a nudge account in order to access the dashboard. See how to create an account on Nudge.
- Make sure you have nudge integrated in your application via our SDKs.
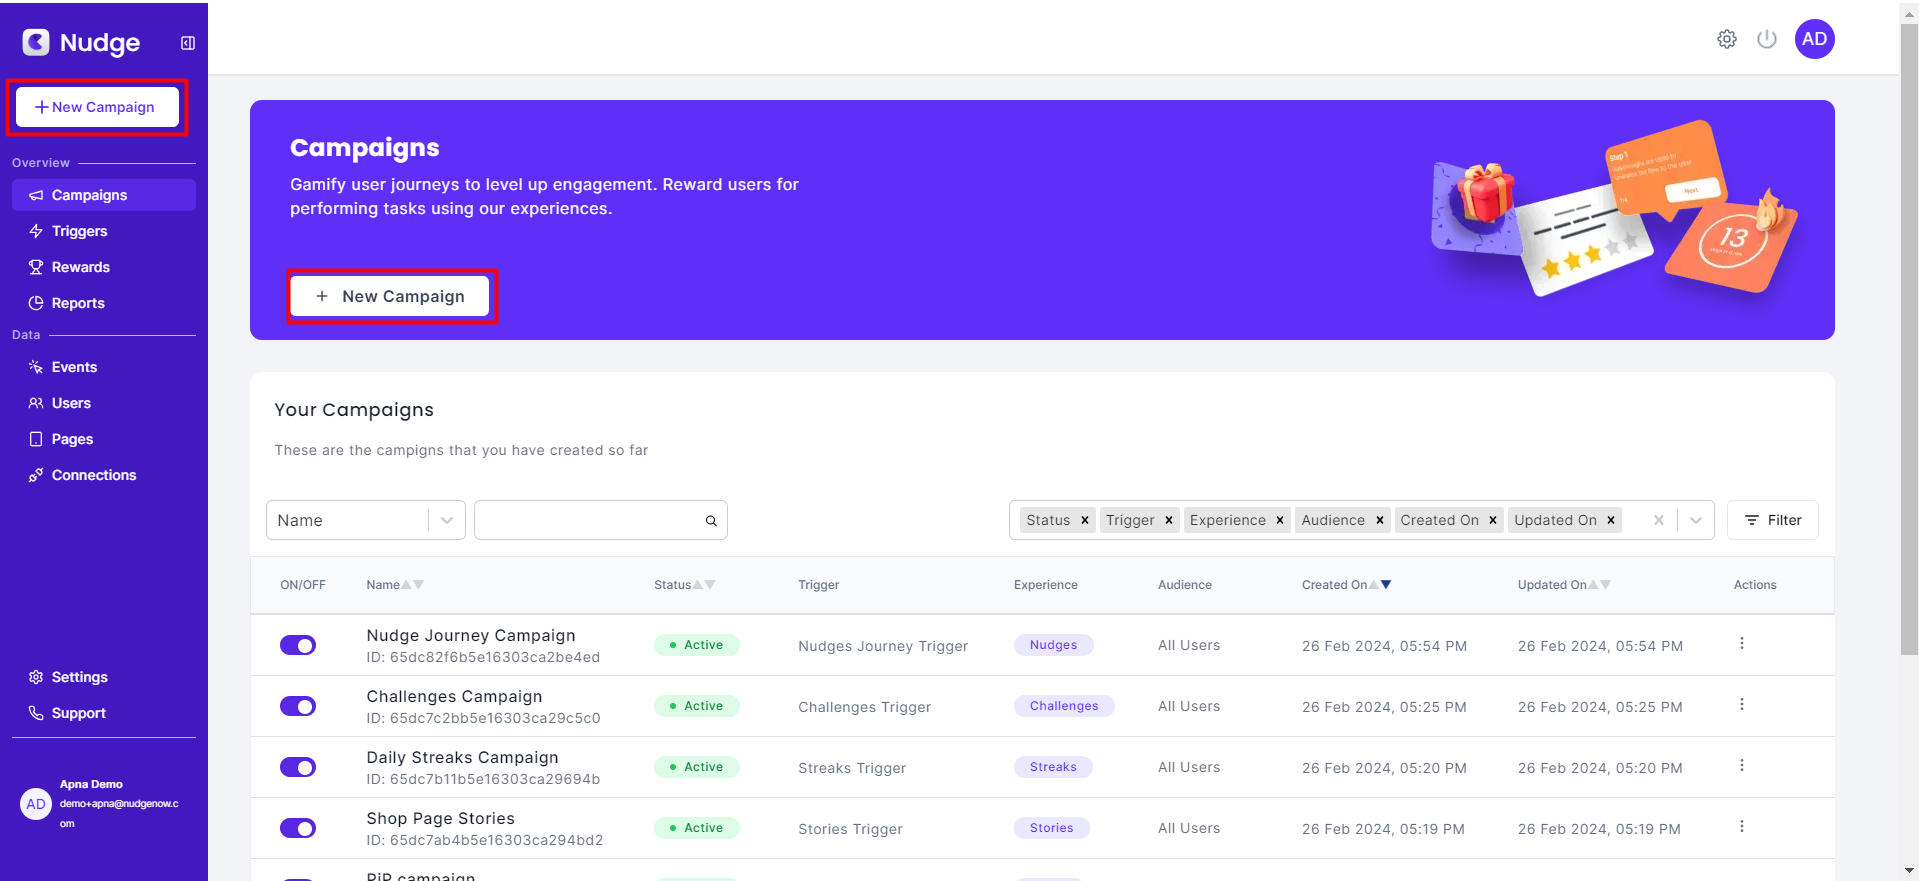
Step 1
Begin by clicking on “+ New Campaign” button eiter on the sidebar or the campaigns page on the dashboard.
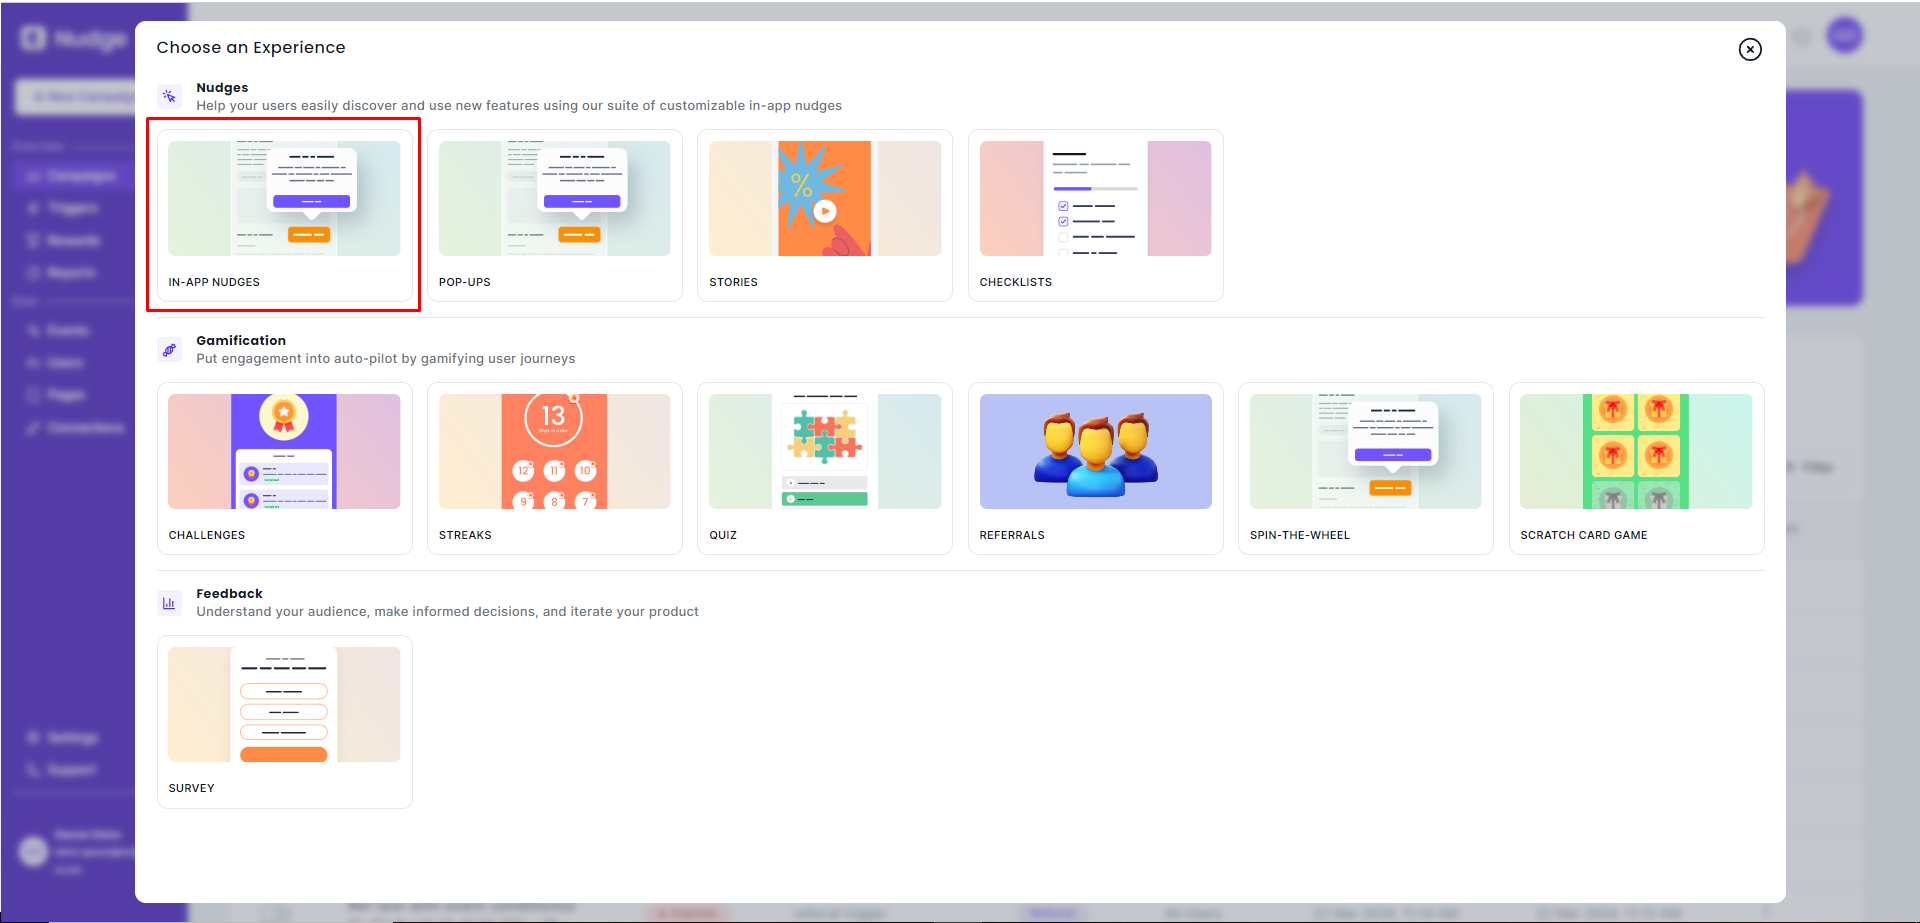
Step 2
Choose "In-app nudges" from the campaign modal.
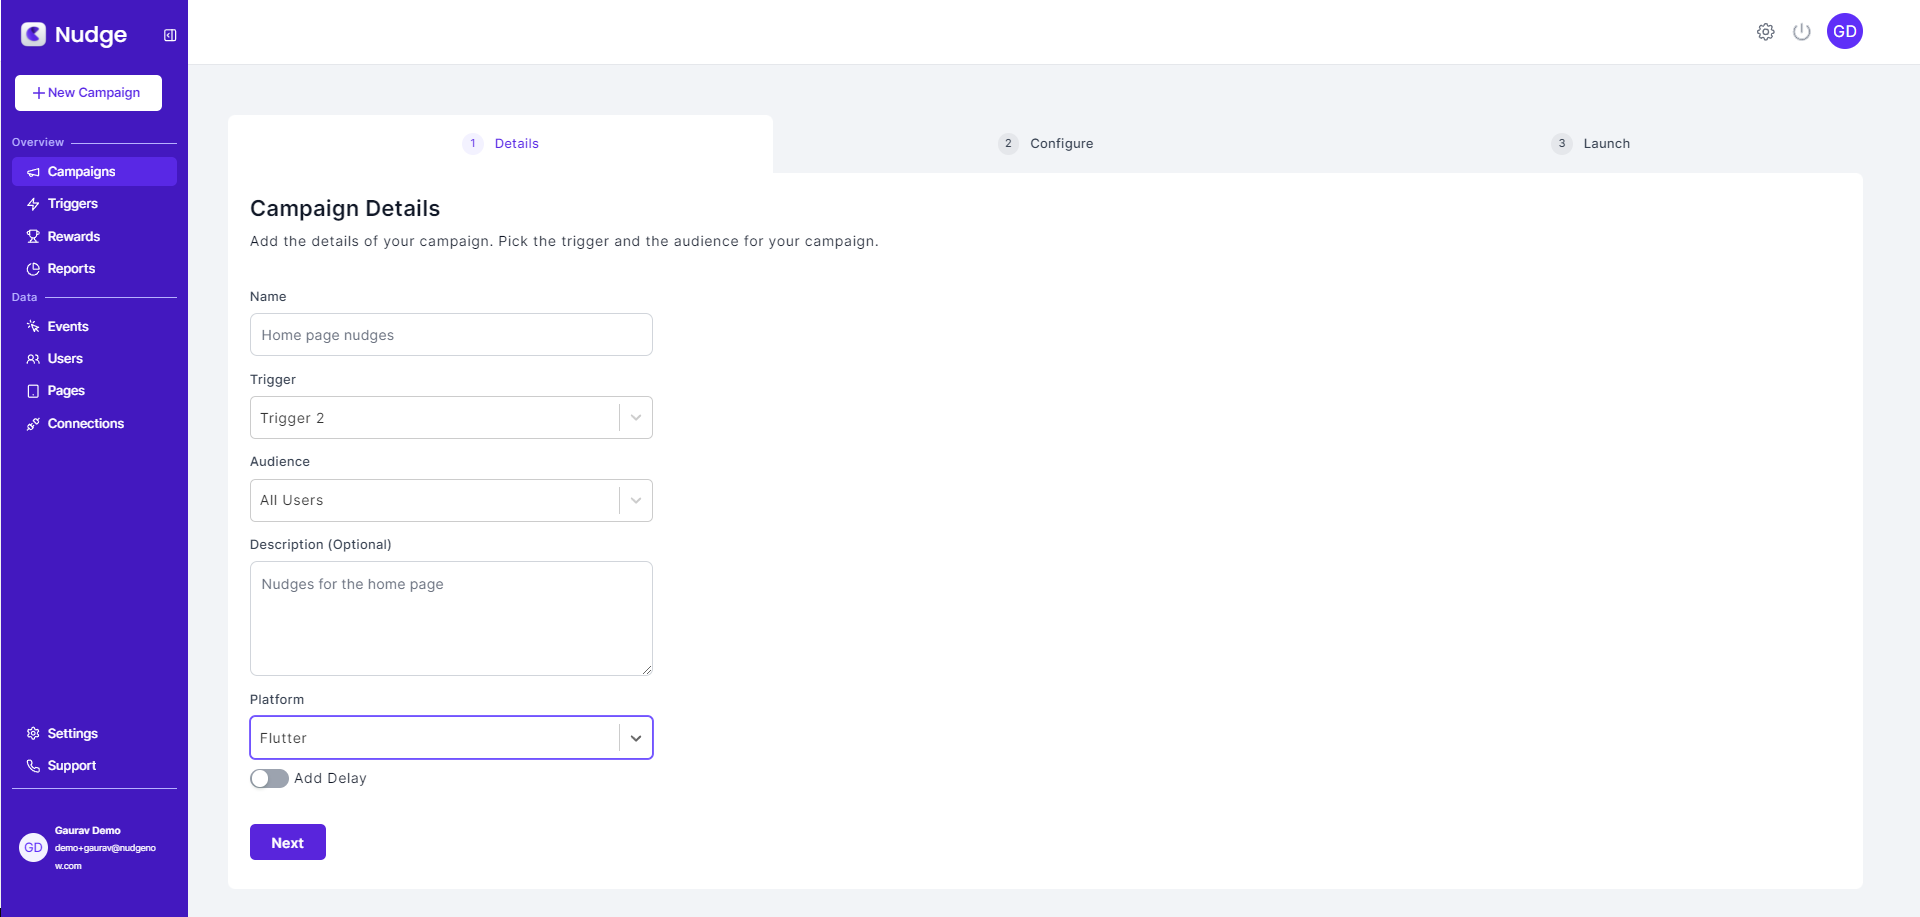
Step 3
Enter the essential details of your campaign. This includes:-
Name: The title of your campaign.Trigger: The action or event that will start your campaign. You can select an existing trigger or create a new one.Audience: Specify which users will see this campaign.Description (optional): A brief overview of what your campaign is about.Platform: The platform where your campaign will run, such as iOS, Android, etc.
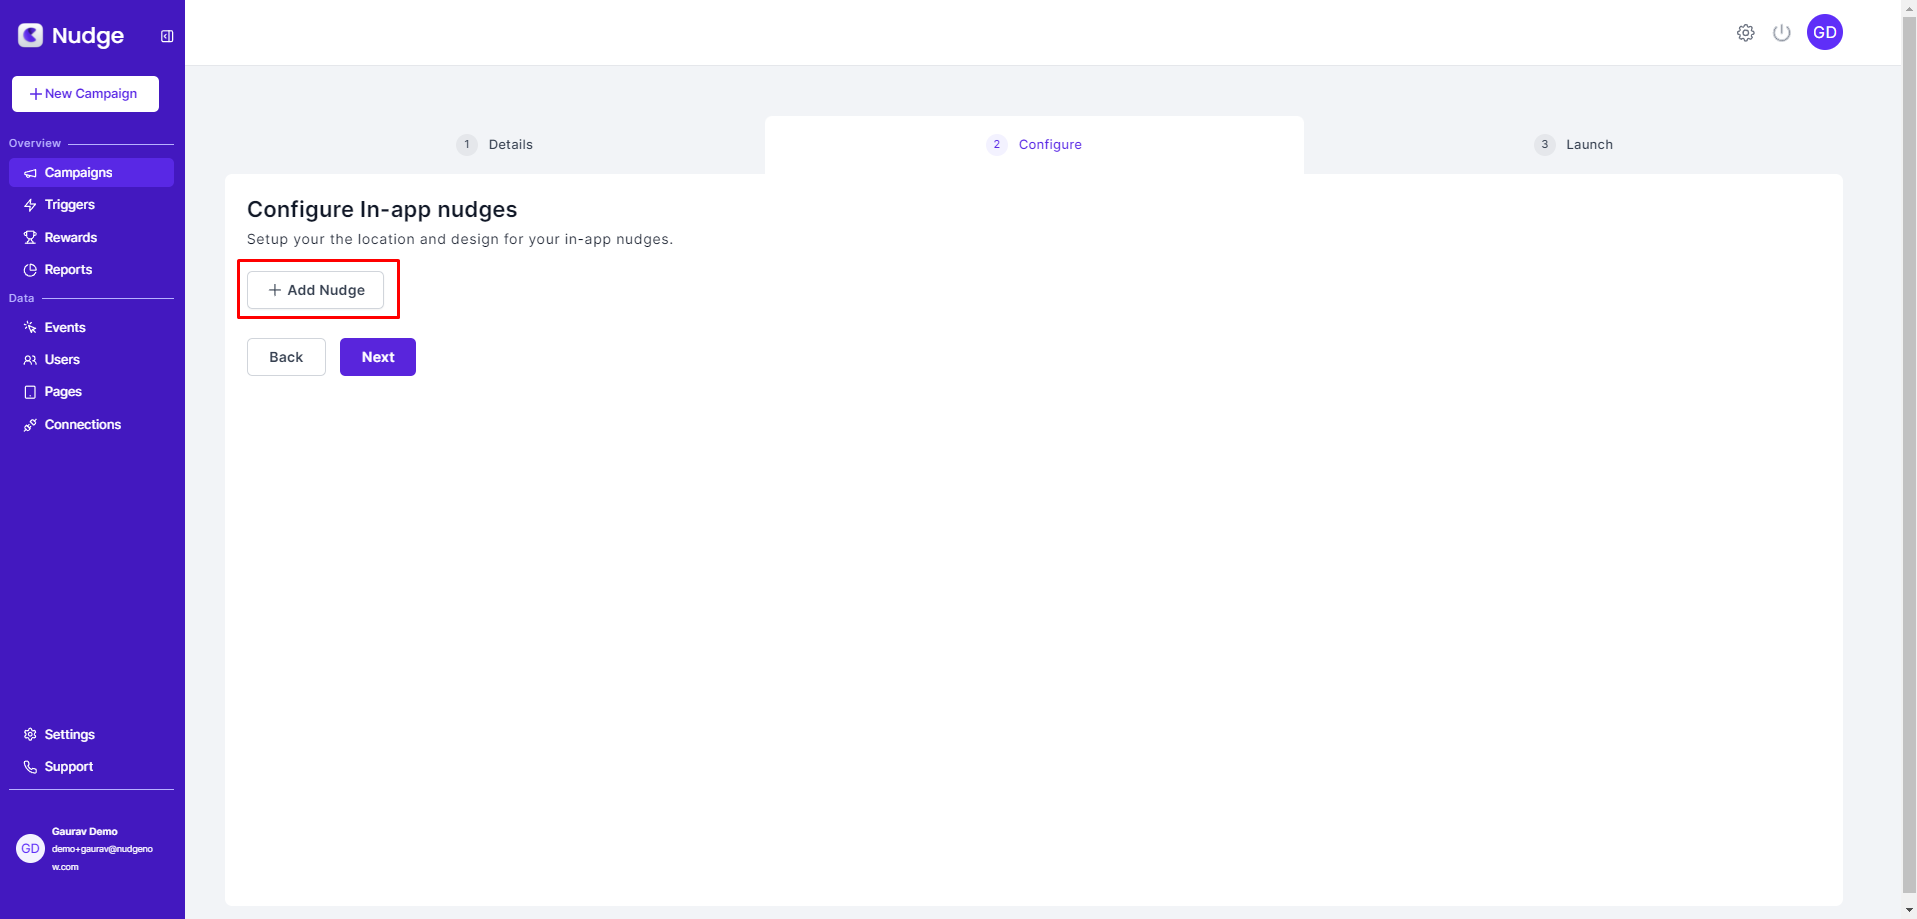
Step 4
Here you can add a sequence of nudges, but for the purpose of this tutorial we will only make one - Tooltip.
Click on the "+ Add Nudge" button.
Step 5
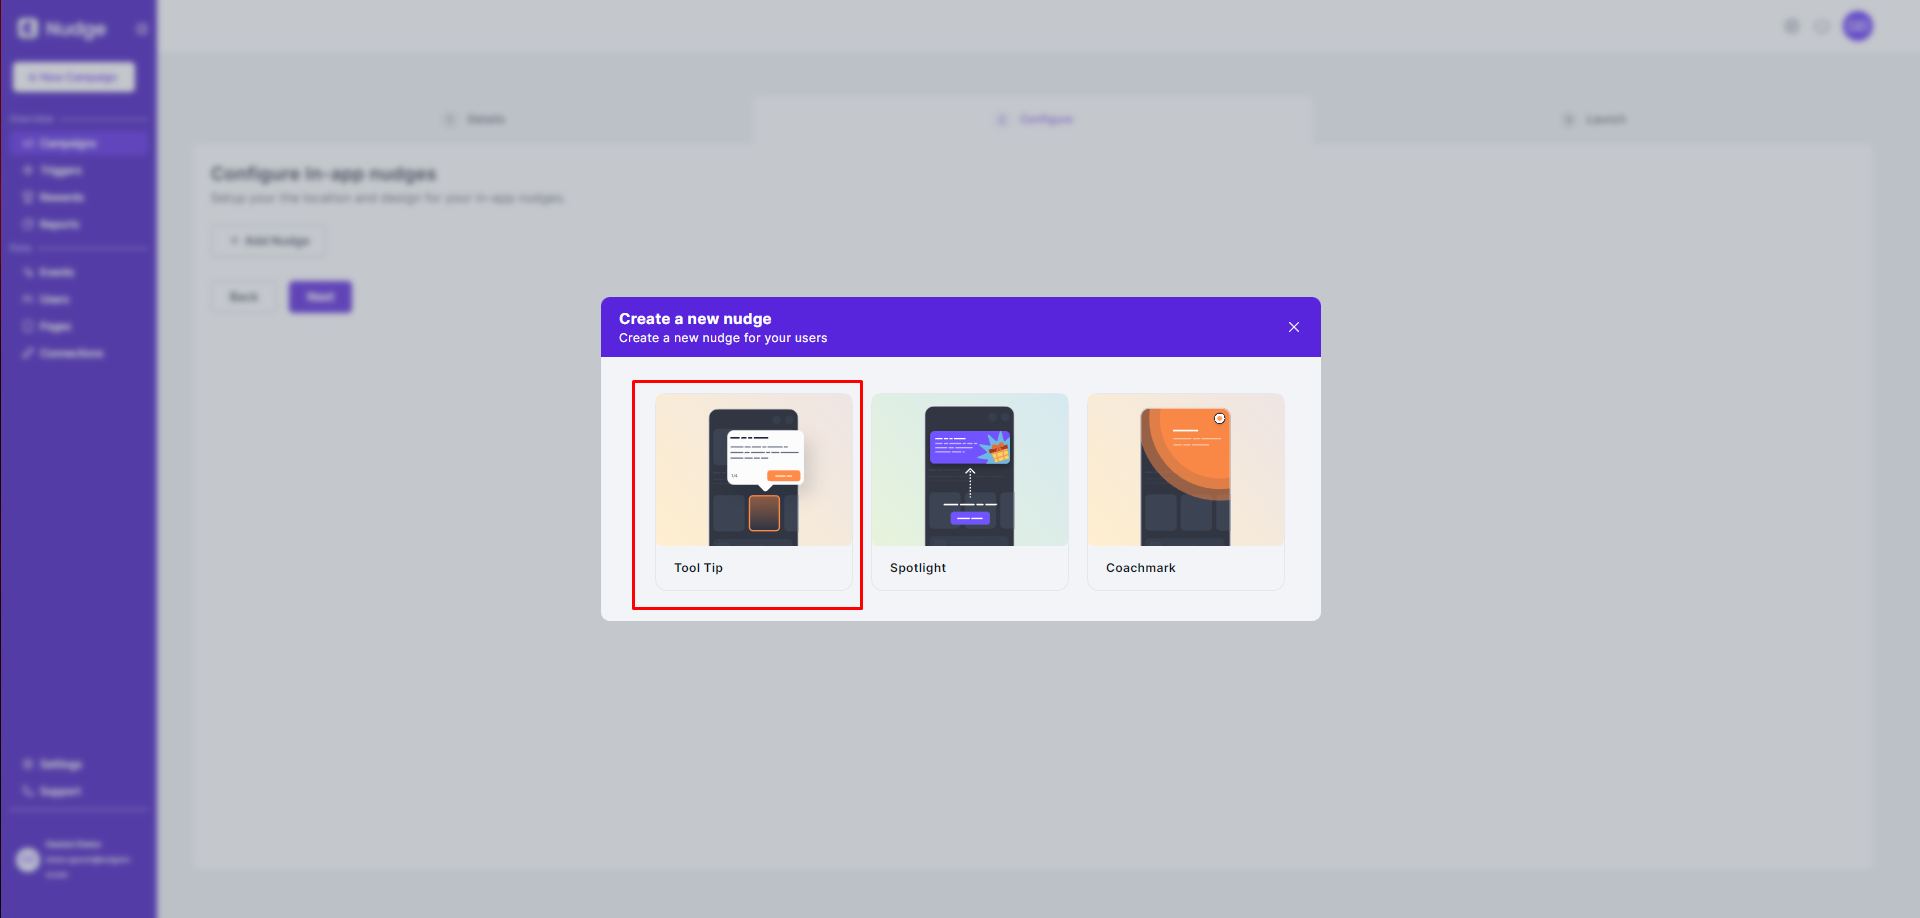
From the nudges modal choose "Tool Tip".
Step 6
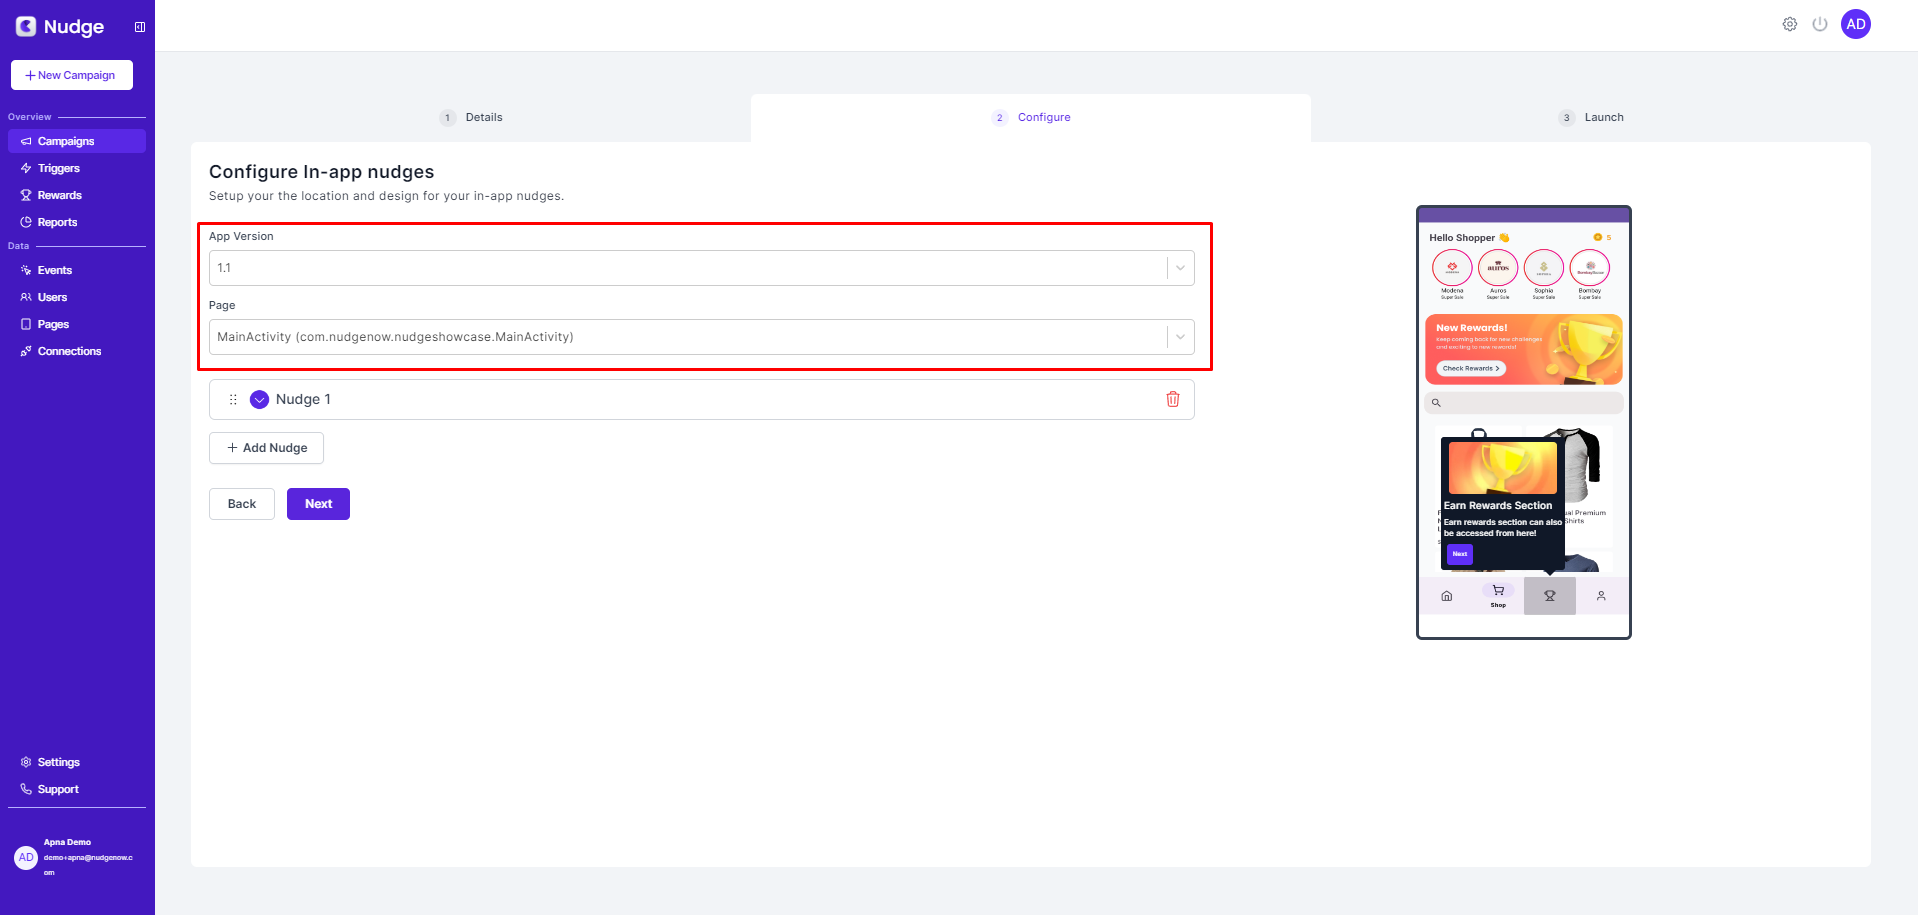
Before anything else, you need to fill the following fields:
App Version: Choose on which version of your app will the nudges be shown.
Page: Choose on which page you want to create the nudges.
Note:
Only the pages you have added to Nudge's dashboard are going to be visible in the Page drop down. See how to add a page here.
Step 7
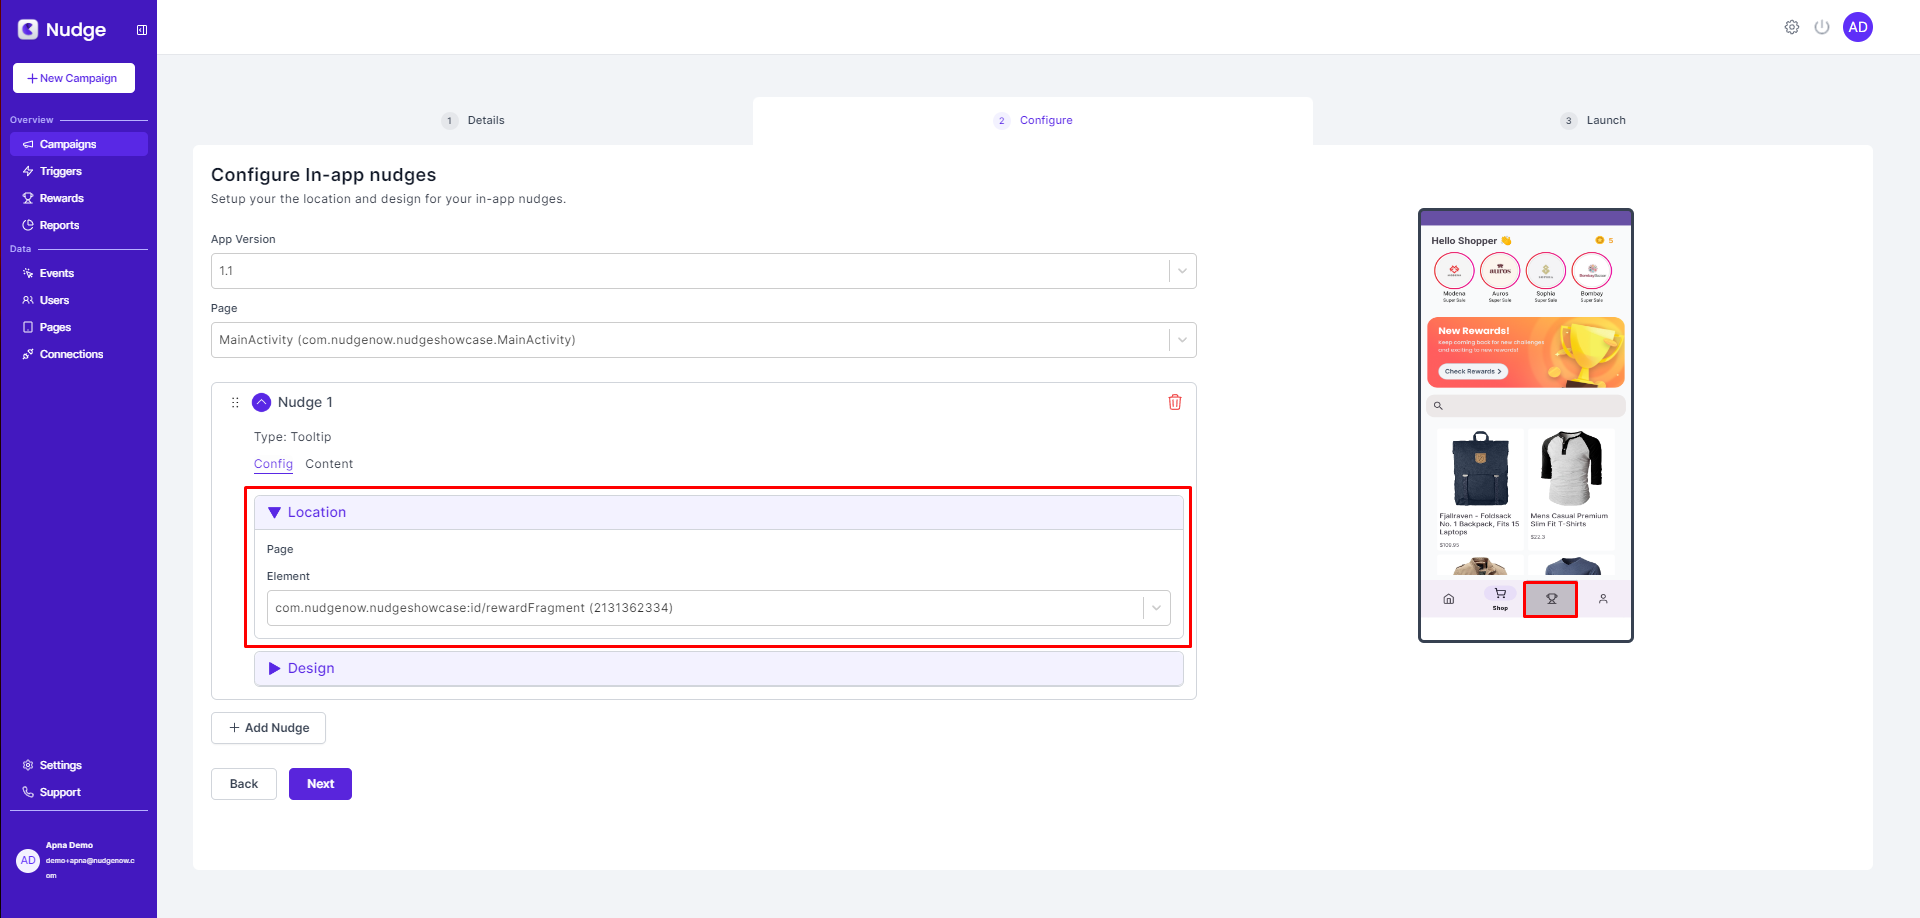
It's time to customize your nudge to your liking.
Each nudge has 2 sections : Config and Content.
Config: This is where you define the location and the design of your nudge. Within the config section there are 2 dropdowns
Location: You can hover over the preview and select an element on which you want to show a nudge, this element will also be visible in the element drop down
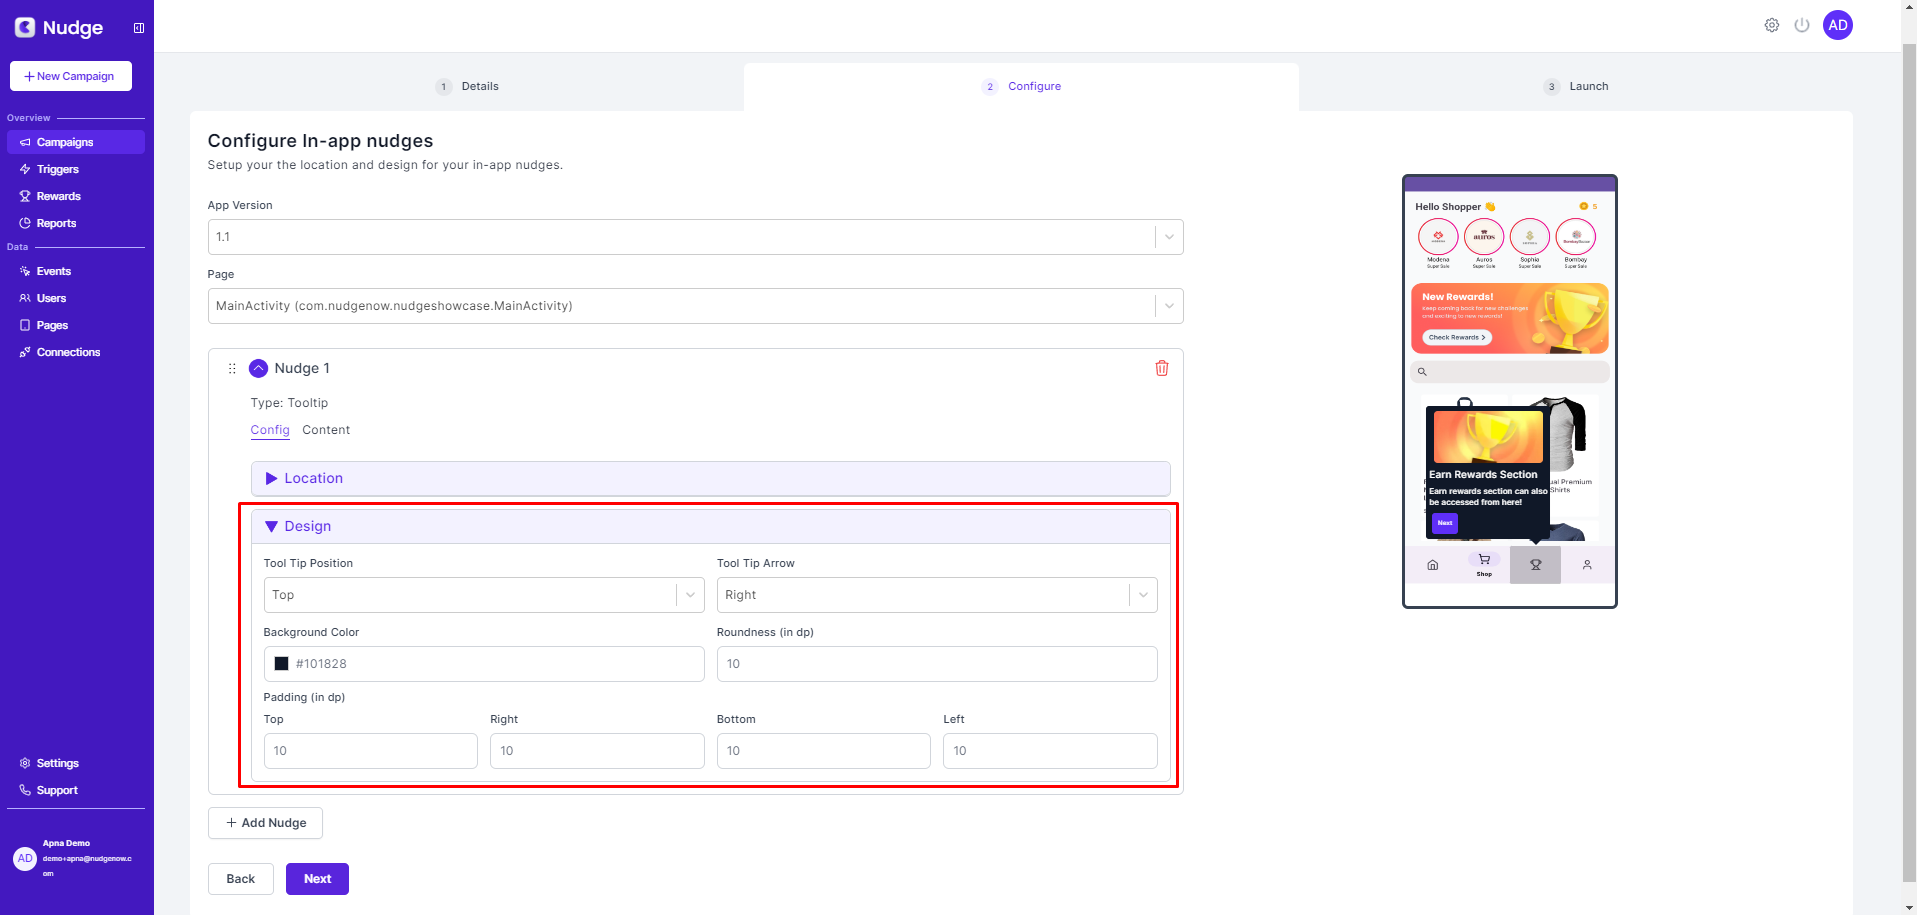
Design: In the design section you can customize the over look of your tooltip.Tool Tip Position: Set the position of the tooltip with respect to the selected component.Tool Tip Arrow: Set the position of the arrow of the tooltip.Background Color: Set the background color of your tooltip.Roundness: Set the roundness of the tooltip.Padding: Set the padding of the tooltip.
Content:This is where you define the content that you want to show inside that nudge.
-
Heading: This is where you fill in the heading of your tooltip. -
Body: This is where you can add the body text of your tooltip. -
Media: This is where you can add an image inside your tooltip -
Action Button: This is where you can customize the action button of your tooltip.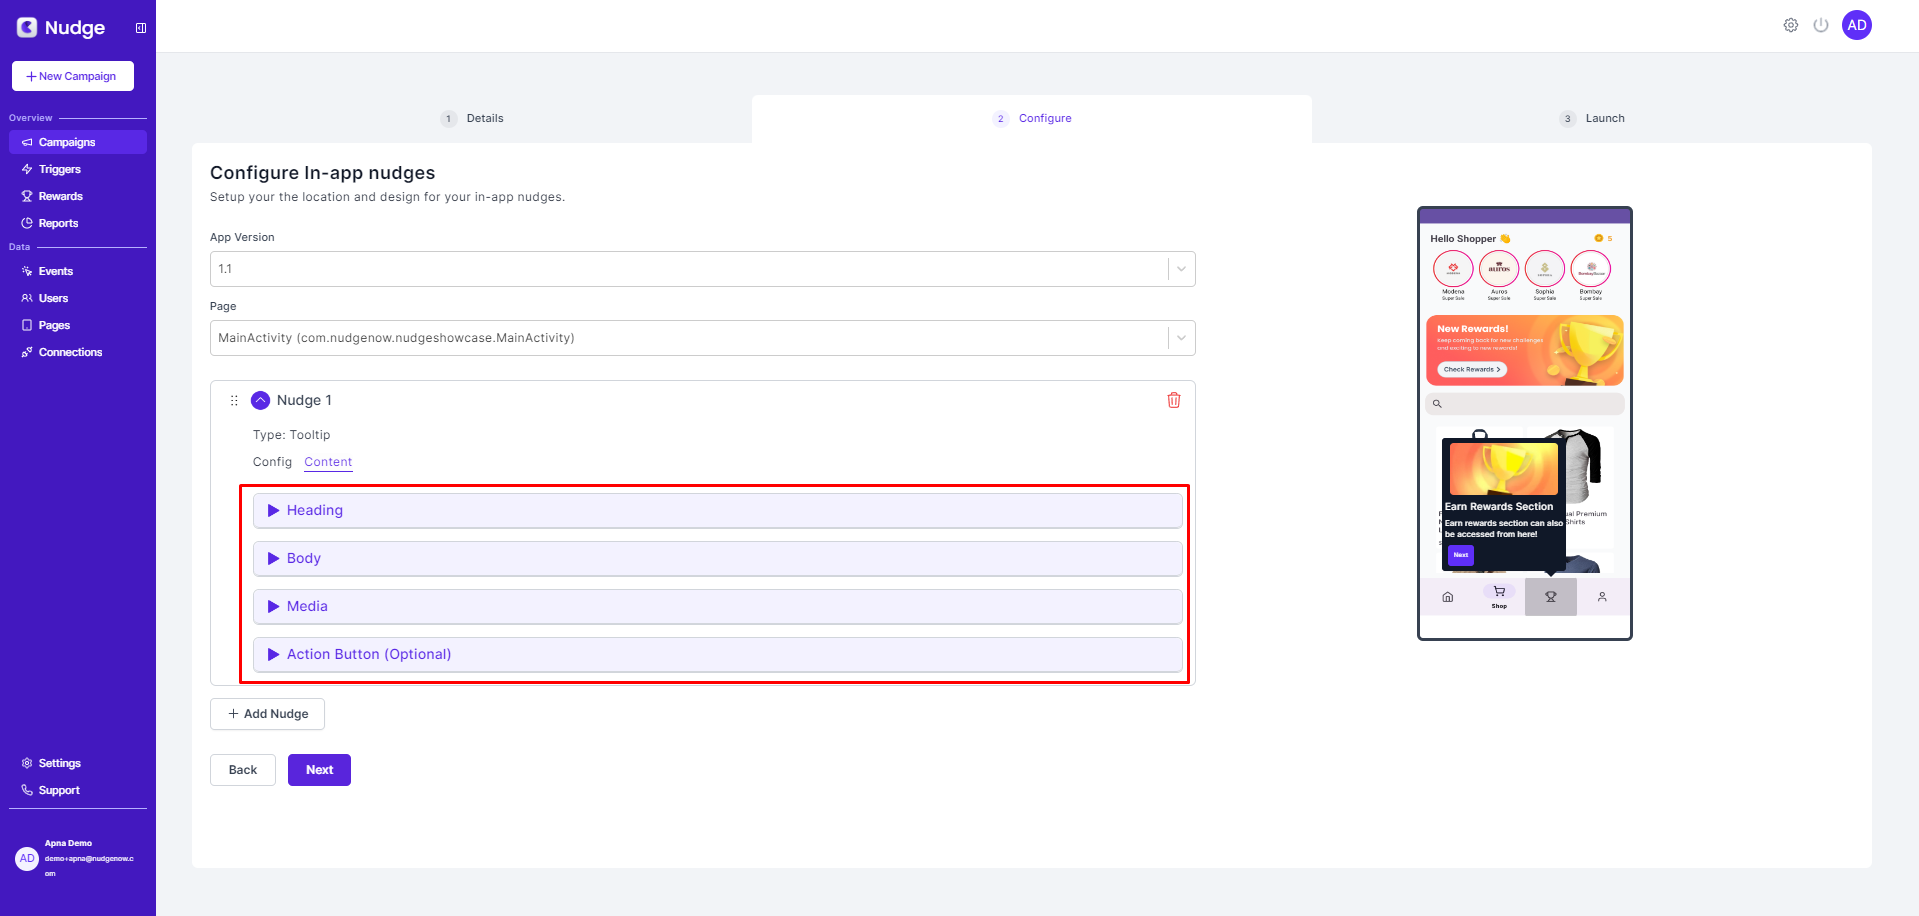
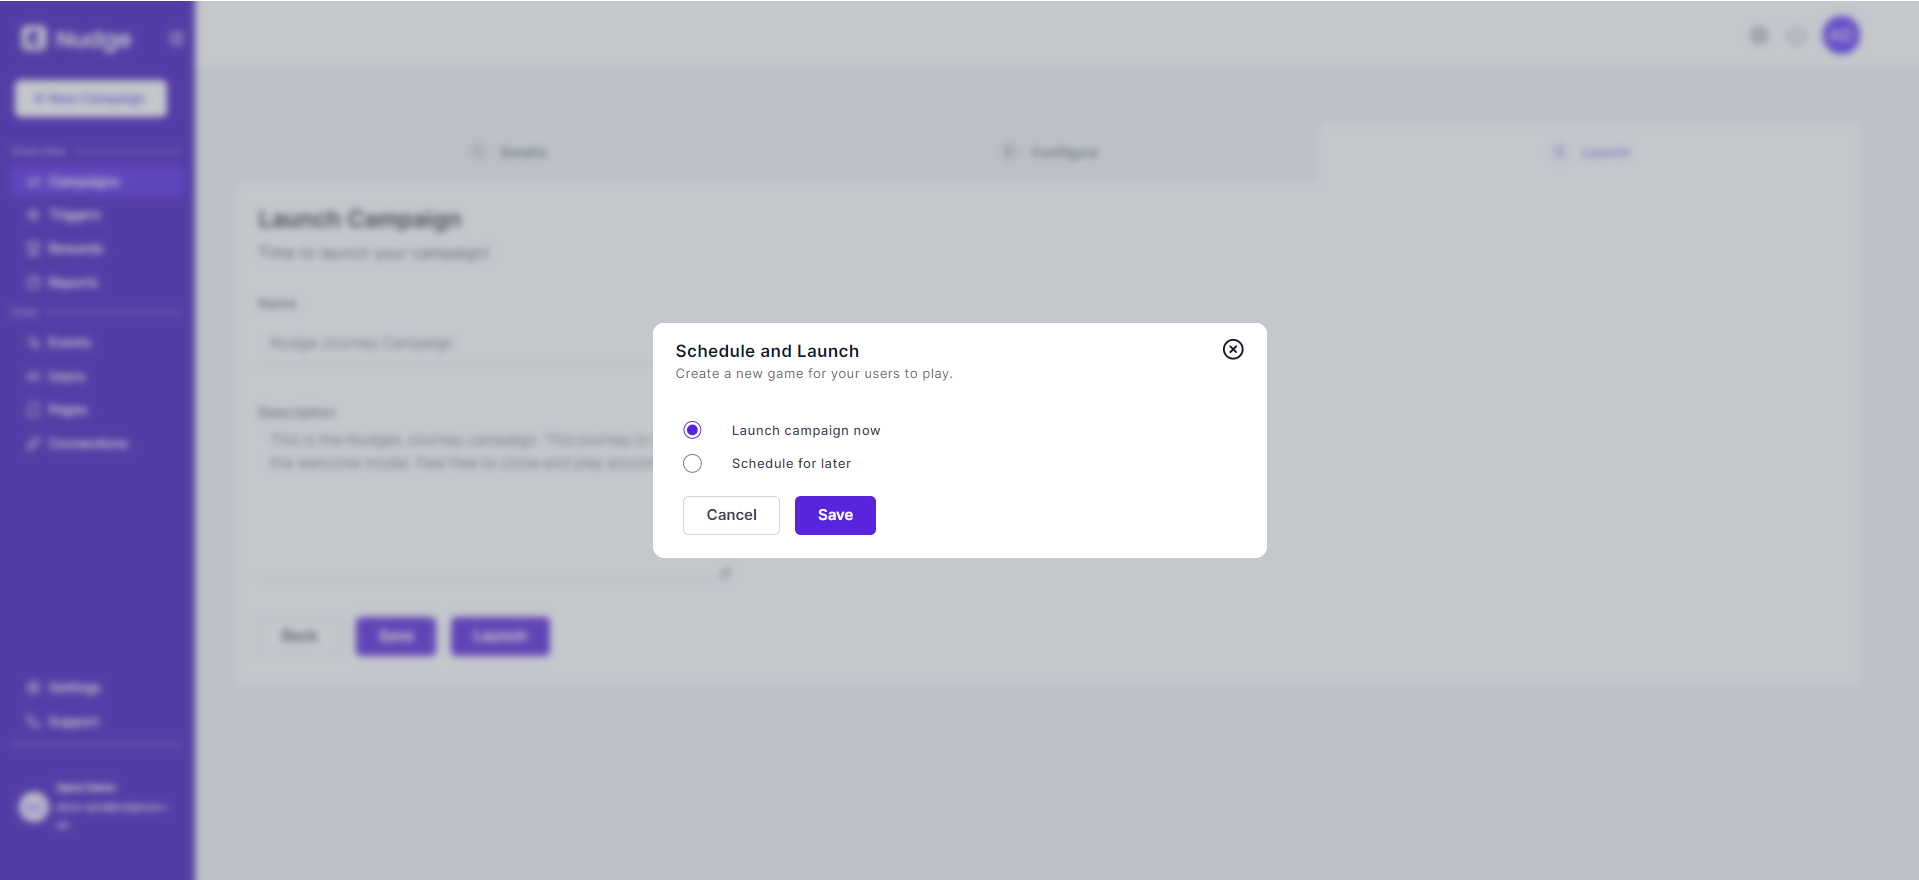
Step 8
Finalize your campaign setup. You can choose to launch it immediately or schedule it to go live at a later date.
See how to schedule your campaign here.
Now you will be able to see the Nudge you created in your application.