To integrate Nudges into your Android application, you need to make sure that the basic integration of the Nudge Core SDK is done, if you have not already done it, check here.
Note: Make sure you have added IDs to your Views in order to create Nudges on them. Without IDs nudges can't be shown on the target views.
Add plugins (required)
Info: Nudge core gives you the core capabilities which include tracking events and users. But to use various features that Nudge has to offer, you need to add the respective plugins for those features.
- The plugin for Nudges that include (tooltips, spotlight, PiP, and coach marks) is called
NudgesUi - The plugin for pop-ups that include (modals, and bottom sheets) is called
PopupUi - Initialize an instance of
NudgesUiandPopupUiand pass them into yourNudgeProviderinstance as a list.
NudgesUi nudgesUi = new NudgesUi();
PopupUi popups = new PopupUi();
NudgeProvider nudgeProvider = new NudgeProvider(
        activityContext,
        nudge,
        Arrays.asList(nudgesUi, popups)
);
val nudgesUi = NudgesUi()
val nudgeProvider = NudgeProvider(
                {activityContext},
                nudge,
                Arrays.asList(nudgesUi,popups)
            )
Connect your application to the dashboard (required)
To create nudges from the Dashboard you need to connect your Android Application to the Dashboard. Add the below snippet to the Manifest file of your App.
<activity
         android:name="com.nudgenow.sdk.nudge_core.NudgePairActivity"
         android:exported="true"
         android:launchMode="singleInstance">
         <intent-filter>
             <action android:name="android.intent.action.VIEW" />
             <category android:name="android.intent.category.DEFAULT"/>
             <category android:name="android.intent.category.BROWSABLE" />
             <data android:scheme="nudge-{ClientID}"
                 android:host="nudgenow.com"
                 android:pathPattern="/.*/.*" />
         </intent-filter>
</activity>
<provider
        android:name="androidx.core.content.FileProvider"
        android:authorities="{YOUR_PACKAGE_NAME}.fileprovider"
        android:exported="false"
        android:grantUriPermissions="true">
        <meta-data
            android:name="android.support.FILE_PROVIDER_PATHS"
            android:resource="@xml/file_paths" />
</provider>
Replace "YOUR_PACKAGE_NAME" with the actual package name. (Example: com.example.exampleapp)
Handling custom application class
If you have your custom Application Class extend your application class to NudgeApplicationClass
class YourApplicationClass : NudgeApplicationClass() {

      // Your existing implementations

}
class YourApplicationClass extends NudgeApplicationClass {

      // Your existing implementations

}
Make sure to add the below snippet to your AndroidManifest.xml file
<application
        ... rest of your code
        tools:replace="android:name">
        ... rest of your code
</application>
Showing nudges inside Activities and Fragments
Extend your Activities and Fragments to NudgeBaseActivity and NudgeBaseFragment to show Nudges in them.
class YourActivity : NudgeBaseActivity() {}
class YourFragment : NudgeBaseFragment() {}
class YourActivity extends NudgeBaseActivity {}
class YourFragment extends NudgeBaseFragment {}
Showing nudges inside tabs
If you have implemented tabs with ViewPager2 and want to show Nudges inside Fragments within tabs extend your Pager Adapter to NudgePagerAdapter(fragmentManager, lifecycle), pass fragmentManager and lifecycle.
class YourPagerAdapter(fragmentManager: FragmentManager, lifecycle: Lifecycle
): NudgePagerAdapter(fragmentManager, lifecycle) {
    // ...rest of your code

}
 class YourPagerAdapter extends NudgePagerAdapter {

    // Constructor matching the Kotlin snippet's parameters
    public YourPagerAdapter(FragmentManager fragmentManager, Lifecycle lifecycle) {
        super(fragmentManager, lifecycle);
    }

    // Rest of your code...
}
Wherever you're implementing your adapter make sure to add the following snippet. Provide the list of fragments that are part of the viewPager to the provideFragments() function. Do this where you have attached your viewPager view with the adapter
yourAdapter.provideFragments(listOf(YourFirstFragment(),YourSecondFragment()))
yourAdapter.provideFragments(Arrays.asList(new YourFirstFragment(), new YourSecondFragment()));
That's it!
Our Nudge Core would now trigger Nudges defined on your Dashboard using the Nudges plugin.
Adding a page to the Dashboard
Step 1:
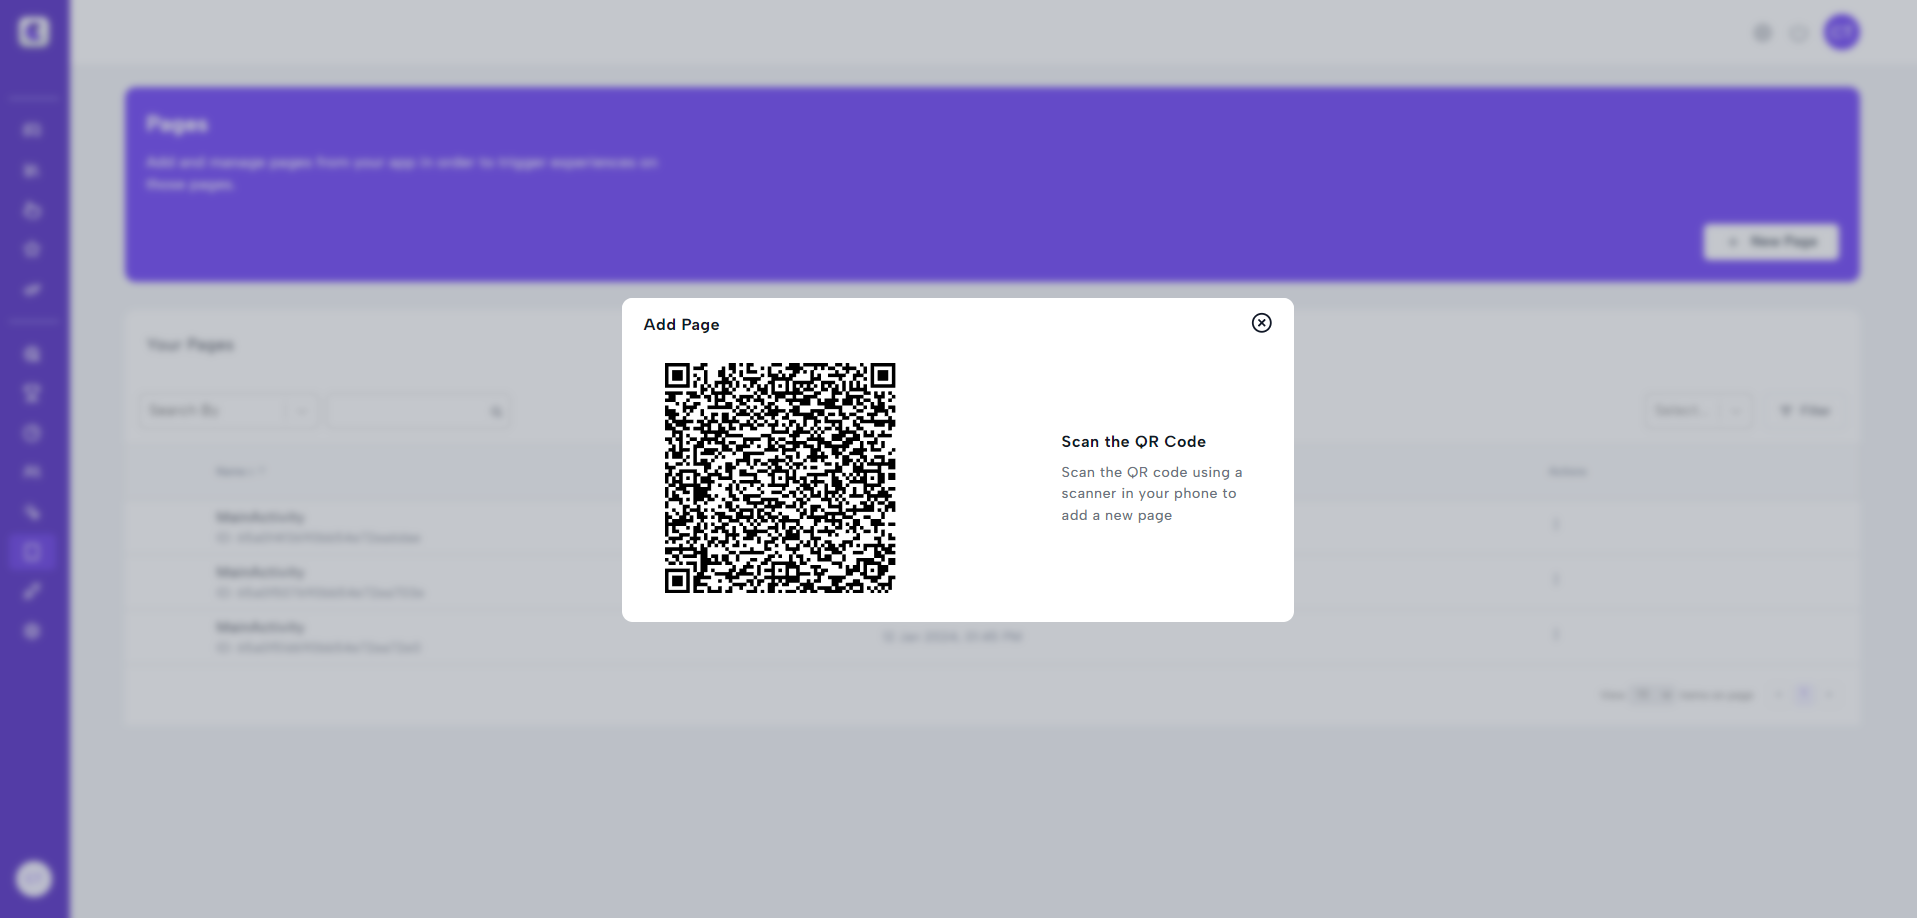
Go to the Pages tab in the Side Navigation and then click on the "+ New Page" Button.

Add a new page by going to the pages section in the dashboard
Step 2:
You will see a QR code. Scan the QR code with your phone.
Note: Make sure you have your current apk that is integrated with the Nudge SDK.
Scan the QR code to add a page to the dashboard
Step 3:
You will be redirected to a page on your phone. Click on "Launch App".
Note: This functionality is only available to the users of the Dashboard and not the end users.
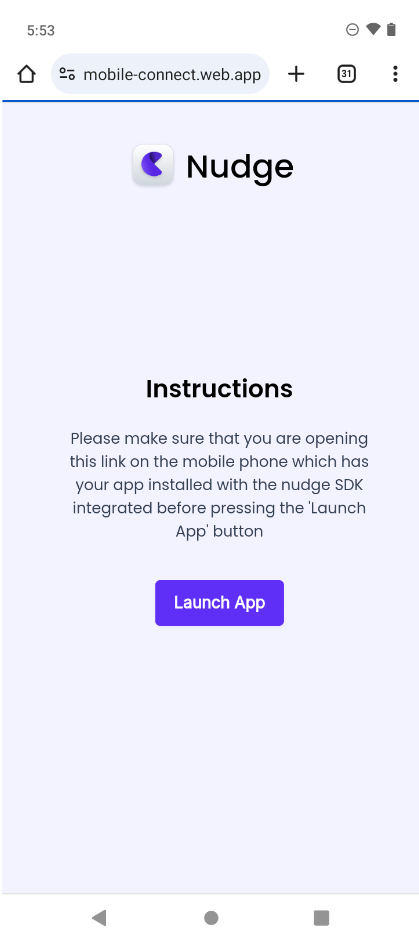
Note: Make sure that your app is not open already. Incase you have the app open, close it before canning the QR code.
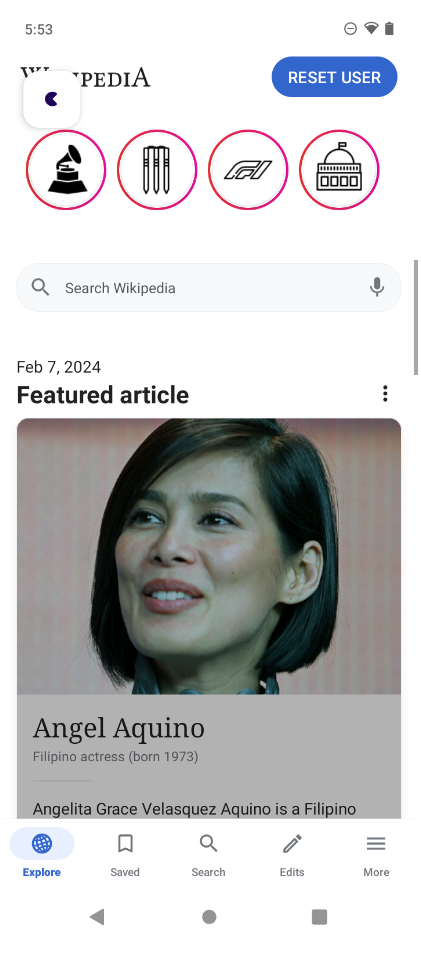
Step 4:
After clicking on "Launch App", your application that has Nudge's SDK will get launched. You will also see a FAB (Floating Action Button) with our logo on it. Navigate to the page you want to capture and click on the FAB.
Step 5:
Inside the dashboard, you should see a pop-up that shows that your screen has been received along with the components that have been captured in the screens. Now, you can create nudges on this page.

Note: Only the views with IDs will be shown here. Any views without IDs won't work.
Tip: It's best to add all your relevant pages at once. This will make your campaign creation process seamless.
Now You can create Nudges From the Dashboard.